PBIO 250 Lecture Notes
James L. Reveal
Norton-Brown Herbarium, University of Maryland

Requirements for a Plant Collection
and its Equipment
Introduction
One of the more enjoyable, but required, aspects of PBIO 250 is the preparation and submission of a plant collection. Making a plant collection allows you to test your ability to identify an unknown plant using Manual of Vascular Plants of Northeastern United States and Adjacent Canada (2nd ed.) by the late Henry A. Gleason and Arthur Cronquist. While other floras and guides to the plants of the region may be used to identify your collection, the nomenclature in Gleason and Cronquist must be followed. However, you may modify the nomenclature to conform to the more up-to-date nomenclature that may be found in the Checklist of the Vascular Plants of Maryland
The technical requirements for the collection are:
- A total of twenty-five (25) different specimens represented by twenty-five different species of which no more than two (2) species belonging to the same family.
- Each specimen is to be properly prepared, dried and labeled as outlined below.
- A fieldbook is required with the original data presented therein.
- Each species is to be correctly named with both the family and scientific name indicated.
Each specimen will be graded as to its condition (50%), its scientific identification (25%) and the information and nature of the label and fieldbook (25%). The collection is worth 50 points.
Making a Plant Press A plant press is one of those personal expressions that says much about the collector. For the majority of students, this exercise will be your once and only attempt to collect plants. For others, however, this will be the start of your professional career and a good plant press can last for years.
A plant press consists of two endboards, two end cushions composed of several pieces of corrugated cardboard, numerous press units, and some sort of strapping device. All pieces are cut 12 x 18 inches.
Endboards: If you are going to make a permanent plant press it is recommended that you make them of 3/4 inch marine plywood or at least 3/4 inch plywood. The boards should be so strong that they will not bend under extreme pressure. If you are making just a quick and easy press, 1/4 inch plywood is generally adequate. This will bend and occasionally will break (especially so with time), but it does the job insofar as PBIO 250 is concerned. It is not necessary to stain or treat the wood, but to get longer life it is advisable. Remember, cut the wood 12 x 18 inches.
End Cushions: This is an optional feature. Tape four to six pieces of 12 x 18 inch, double-faced corrugated together to form a single piece. Make two of these and place them between the endboards and the press units. These will keep press units from rubbing against the wood of the endboards.
Press Units: A press unit consists of a sandwich of two pieces of deadening felt - a blotter - (or some other water absorbing material) with a double-faced piece of corrugated cardboard in between. The deadening felt removes moisture from the plant specimens while the corrugated cardboard allows warm air (in the drying process) to pass along side the felt. Think of it as blotter-cardboard-blotter equals one press unit. As felt is hard to find, thick folds of newssheet can be used provided these are changed every so often. Long experience at College Park has shown that the spring schedule to classes make the best substitute for felt. The "schedule" is 12 x 16.5 inches so it is perfect. The University is always struck by the large run on schedules during the spring semester! To get your corrugated cardboard, most students haunt the local markets and large appliance stores. Stores are often delighted to get rid of cardboard. Remember, when you are cutting your cardboard 12 x 18 inches, make sure the holes run the short distance, thus:
                                     12 inches
                                 °---------------°
                                 °---------------°
                                 °---------------°
                                 °---------------°
                                 °---------------°18 inches
                                 °---------------°
                                 °---------------°
                                 °---------------°
                                 °---------------°
Straps: Good 1/4 to 3/8 inch nylon rope is perfectly fine for most plant presses. Depending upon the size of your press, the rope should be from five to eight feet long. Heat both ends of the rope to prevent them from coming apart and tie a loop at one end. A hackamore knot is an excellent one. If one wishes, army surplus stores sometimes carry reasonably good nylon straps that are easier to work. An excellent strap is now made to hold loads on cars and trucks, but at about $9.00-14.00 per strap, this is only for the most determined collector!
Assembly: Place the two ropes or straps on the ground and place one of the endboards on them. The ropes or straps should be about two or three inches from each end of the endboards. Place one of the end cushions on the endboard and then add the ten to fifteen press units you have made. These are followed by the second end cushion and the remaining endboard. Wrap the ropes or straps around the press with the rope loop or strap buckle near the bottom of the stack. Tie up the press. When the press is empty, you should have at least two feet of extra rope.
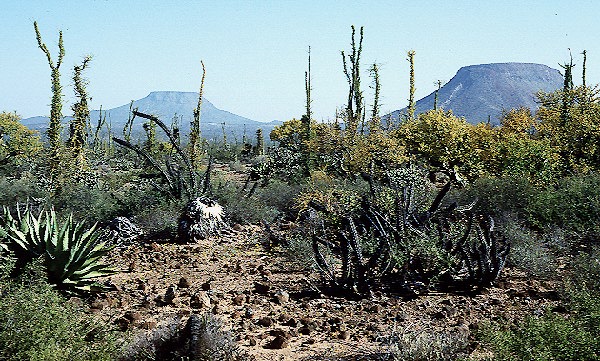
Where and What to Collect Only native and naturalized plants may be collected. No collecting is allowed on the University of Maryland Campus or any of its farms. By state law, no collecting is allowed in any state or county park; by federal law no collecting is allowed in any National Park or on any National Park and Planning property. As a matter of courtesy, collecting on private property should be avoided. This leaves roadsides (but not along Interstate highways) and state forests - at first sight a rather limited set of choices. Nonetheless, you may collect on county property (unless posted) and there are numerous public sites which are not part of any park property. A reminder, while it is possible to collect on wildlife refuges, it does require prior permission from the local administrative office.
It would be nice if everyone would avoid collecting in the Washington, D.C., area, including all of Prince Georges and Montgomery counties. However, it is also understandable why, for many, this is impossible.
In general, a good rule of thumb is to collect only a small set of samples from a large population. You should avoid collecting all of something and the last of anything. While only a few samples of a species may be in flower, a review of the local habitat may show that they are several individuals not yet in flower, or past flowering. In such cases, a small collection would be reasonable. One of the field rules followed by many plant collectors is the one in twenty rule for herbaceous perennials - for ever twenty plants, only one can be sampled.
In the case of annual plants, a similar guideline is usually well to follow, but as annuals tend also to be weedy, one can considered a larger area for the one in twenty rule. As for trees and shrubs, it is best to selectively trim a few pieces from different individuals so as not to damage, in any way, the long-term survival of any individual.
In collecting annuals, one should attempt to gather roots, flowers and fruits. Some groups, such as Brassicaceae, require fruits for identification. All dirt should be removed from the plant. If you are collecting a biennial, both the first and second year forms are useful, but at least flowers are required (again, Apiaceae requires fruits). As for herbaceous perennials it is best to avoid taking the root system. A small piece of the root, or a single bulb, may be necessary for proper identification in some groups (Poaceae, Liliaceae), but there is rarely any need to actually destroy the plant to make a good collection. While flowers are required, some species may also require fruits or mature seeds. When collecting members of Poaceae, Cyperaceae and Juncaceae, for example, it is well to make observations regarding rhizome, the presence of which can be critical in the identification of the plant. Many other groups may have stolons or rhizome, and while a piece of the stolon can easily be gathered, the presence of a rhizome in some other groups might better be just simply noted rather than collected.
When collecting trees and shrubs, reproductive structures are vital. Cones, catkins and similar structures need not necessarily be new. However, every effort should be made to collect fresh flowering and fruiting parts if possible. Several species will actually flower before leaves are produced. Such individuals may be collected, but for proper identification in some groups (for example, Fagaceae), leaves and even mature fruits may be necessary.
How to Collect and Some Remarks on Safety The fun of being in the field can turn to misery if all of your efforts are ruined because you fail to process your material promptly, or you or others with you are hurt. How one goes about collecting is important.
When going into the field, wear field clothing - long pants, long-sleeved shirts, stout boots or shoes. This is not a trip to the beach or a stroll along some path. Except to get dirty, and in the middle Atlantic region, assume Toxicodendron is everywhere. Watch where you put your feet and hands. We have rattlesnakes and copperheads, and while the large spiders in the forest are generally harmless, finding one creeping up your arm can be distracting. Wasps abound and chiggers and mosquitoes are common. Plan ahead.
In the field you should carry a pocketknife, your handlens, a small ruler, your field notebook and an array of plastic bags. When you find something you wish to collect, it is best to jot down a few notes: flower color, size, and anything else that you might need to known in the future. Obvious the exact location of the collecting site should be noted. Collect only enough plant material to fill an herbarium sheet and to identify the plant. Put each species in a different plastic bag, place a moist paper towel around the specimens in the bag, number the bag, and tie it shut. Keep the bags out of the direct sun. This will work for the vast majority of plants you will encounter.
Aquatic and succulent plants may require special handling. For Lemnaceae and other small aquatic plants, these can usually be "flicked" onto the newssheet for drying without any type of special arranging. Members of Cyperaceae, Potamogetonaceae and related families that are found in aquatic habitats often can be placed directly in a plastic bag without a moist towel. It is often necessary to actually wash the roots and lower stems to remove mud; this should be done before going into a bag as otherwise the entire plant will get muddy. As for succulent plants, the thick, fleshy leaves or stems should be cut in half and hollowed out. Thin cross-sections of the succulent portion can be prepared to show the overall shape of the structure.
Preparing a Specimen for the Plant Press By now you have seen numerous herbarium specimens. One key to a good specimen is the way the specimen was prepared. All material is pressed, flattened and dried. To aid in the flattening and drying process, it is often useful to trim away thick or bulky material with a pocket knife. Thick roots and stems should be cut in half; an over abundance of leaves trimmed away; fleshy fruits sliced into sections. The goal is to have a representative specimen that is not too bulky.
Small annual plants are the easiest to prepare. Except for removing dirt from the root, usually nothing else needs to be done. Large annuals may require the root and stem to be trimmed, however. As for herbaceous perennials, the proper thinning of excess leaves and stems, without destroying the aspect of the plant itself, usually results in a good specimen. All dirt should be removed from the roots, and occasionally dead leaves. Tree and shrub should be collected using nippers or a knife with the actual trimming process done on the plant itself. There is no need to cut off a large branch just to get a few pieces; collect only what you need initially.
Remember, bark of certain trees and shrubs is useful in ascertaining the species. Care should be taken when gathering bark, and thin strips are nearly always adequate. Dry fruits, cones and seeds may be placed in a paper bag and submitted when the dried specimen is turned in. Such items will be places in boxes in the herbarium. The bottom line is that you want a flat specimen showing all aspects of the plant.
Pressing Plants for the Herbarium A good specimen is made in the field, not in the herbarium. It is therefore necessary to keep in mind what it is that you are preparing and how it will look on a sheet of herbarium paper. The standard herbarium sheet used in most North American herbaria is 12 x 16.5 inches. Thus, when preparing specimens, it is critical to remember that both the label and the specimen must fit within these limits.
The individual specimen should be trimmed as appropriate and sized to fit the sheet. Tall specimens may be bent so as to allow the entire plant to fit on the sheet without its actually being cut into sections. In some instances it might be necessary to prepare bottom, middle and upper portions if the individual is too tall to fit on a single sheet. In some cases, two or more sheets may be necessary to best show the features of the plant. However, this should be avoided.
Open up your press and remove all press units, save one. At this point you should have your ropes or straps, one endboard, one end cushion and one press unit of felt-corrugate-felt. To this add one piece of folded newssheet. Amazingly, if one removes the staples from the spring schedules, the individually folded sheets just happen to make perfect pieces of newssheet into which you may press your plant specimens. Open up the one sheet and you are ready to begin.
With annuals, you can often plan to put several plants on a single herbarium sheet. With this in mind, try to sample the variation within the population and put some of it onto your proposed sheet. For largish plants, it is often useful to have one full-size plant (if appropriate) and then parts of other plants. For example, inflorescences or individual flowers might be added to your sheet so that, with the label, the sheet is full. If you are pressing parts of a tree, then portions with leaves, flowers or fruits should be present on the sheet if at all possible. In all instances, you should strive to have a full sheet showing as much variation as is possible.
As for the individual parts of the plant, make sure that each full sheet shows upper and lower leaf surfaces and side and face views of flowers. Make sure the leaf blades are flat, not folded. In some cases, it may be necessary to cut open a flower or at least a corolla tube to show the number, position and arrangement of the anthers. Make sure there are enough of these specially prepared parts to fully demonstrate the critical characters of the flower.
When you are ready to start pressing your specimens, lay them out in the arrangement you want them to appear when eventually mounted. Place each on the single-fold of newssheet, using your hand and fingers to hold pieces in place. When you are basically satisfied, close the newssheet.
After you have completed one sheet, fold the newssheet over the specimens and write your collecting number of the newssheet. Then add a press unit and repeat the process until all of your plants are in the press. Add the unused press units, the end cushion and the upper endboard and retie your press. This time, however, you want to tie the press as tight as you possibly can without breaking the ropes or endboards. The tighter the press, the flatter the specimens.
It is often useful to open your press after about twelve hours and rearrange individual leaves or parts of the plant so as to make the best possible specimens. This added bit of effort is often the difference between a good specimen and a great one. This can reflect upon your grade. Remember, half of your grade is based on the final condition of your specimens.
Drying Plant Specimens As soon as possibly, the press should be brought to the laboratory and placed in the electric drier. Remember, the sooner your plants dry, the better your specimens will be. Flowers that lack color or leaves that are not green are often an indication that the specimen was poorly dried.
It will take at least two days for your specimens to dry provided that your felts are dry when you begin. Because moisture is being driven off by the drying process, it is necessary to come in at least once each day to tighten the straps. As noted above, that first day it is important to check, and if necessary rearrange your individual specimens so that the leaves are in the proper position and the flowers are right. If your felts are overly damp, change them at once.
To determine if your specimens are dry, touch each plant with the meaty part of your hand at the base of your thumb. You can sense moisture in this way. If a press is going back into the drier for a third day, it is advisable to change felts and replace the damp ones with dry ones. Because some sheets may be dry, while others are still wet, it is best to remove those that are dry. Additional heat can be harmful. Dry specimens should be stored in a dry place and away from mice and bugs.
Thin, well-trimmed, properly flattened specimens dry best.
Identification of Your Specimens All collections should be identified as soon as possible. If you are actively collecting, it is often impossible to process and identify your material at the same time. It is best to collect specimens in plastic bags, keeping them in the dark and cool, and then press your plants out of the wind at home. Specimens kept cool, moist and out of the sun will last for ten hours or more even without roots. Collect enough in the field to both make a good, full sheet and to have enough left over to identify. Good field notes enable you to recall height of the plant and other observations you have made while collecting. It is a good idea to record the number of sepals, petals, stamens and note the condition of the ovary. Indicate if the corolla is sympetalous or if the stamens are epipetalous. Also note the nature of any zygomorphic condition you might spot. Sketches of the flower made in the field are often extremely useful.
Using an appropriate manual, identify the plant to family, genus and species, adding the author to the binomial. If it is a subspecies or variety, then the infraspecific name and authorship should be recorded into your notebook as well.
Leaving your identifications to the very last often means that you will be unable to make critical observations without doing harm to your dried specimens. While bits and pieces of plants can be kept in the frig for a few days, after about three days they tend to become more like slimy lettuce than one of mother nature's wild flowers.
The Label Each specimen must be accompanied by a typed label. We will provide you with printed labels if you wish, but if you have the proper computer equipment, you can generate your own labels if you wish.
A typical label looks like this:
PLANTS OF MARYLAND
Ranunculaceae
Aquileja canadensis L. GARRETT CO.: Along the county road from Grantsville to Savage River Reservoir via New Germany State Park, 1.4 miles north-northwest of Big Run State Park on a moist limestone outcrop on the west side of the road, associated with Chrysoplenium and Asplenium under an overstory of Quercus, Tsuga and Betula at about 2650 feet elevation. Rare. Plants 1.5-2 dm tall; flowers yellow with red spurs; seeds small, numerous and bright black. James L. Reveal, 7890 15 May 1992 C. Rose BroomeNorton-Brown Herbarium (MARY) University of Maryland, College Park, MD, U.S.A.
A label should contain the following items:
- Regional or national location where the plant was collected, its scientific name and the family name, ecological and habitat data, information about the plant, collectors and collection number, date the collection was made, and an indication of the institution of origin for the specimen.
- The printed labels will have PLANTS OF MARYLAND (or whatever state, including the District of Columbia) and the information on the Norton-Brown Herbarium already on them. You will have to provide all the other data in the following fashion:
- Family name: On the line below the printed header.
- Scientific name: In italics or underlined and centered. If there is an infraspecific name, it will be on the next line and centered.
- Location: Indicate, in caps, the county where the plant was found followed by a colon (:). Then give the location where the plant was found so that (a) the spot might be found by someone else, and (b), a person with a generalized road map could find the location again. Avoid such references as "hill near my house" or "front of grandfather's barn". Remember, someone in the distant future may well be trying to find this spot again.
- Habitat: Try to indicate where, at the locality, the plant can be found. This can often be done by noting the type of soil or rock outcrop, exposure, or general condition where the plant is found. You can amplify this by indicating the associated plants. In some cases, elevation is useful. Likewise, a general statement about the abundance of the plant may be helpful, especially to those in the future studying plant distributions.
- Descriptive information: Information about the plant that either can not be seen or might be lost in the future should be recorded on the label. Some taxonomists add local common names if they learn them. Observations are often useful and can help future scientist better understand the plant.
- Collector(s) name(s) and number: All person involved with the collecting of specimens should be recorded within reason. Mostly the names of two to five additional collectors are recorded on labels. However, the primary collector's name appears first and the collector's collection number is reported. All collectors assign a collection number to their specimens. As most of you will be collecting for the first time, your numbering system will likely start with 1. If you continue after this class, you should continue your numbers in sequence. Some collectors have elaborate numbers like 940101 for first plant and the first collecting site in 1994. A large number may seem impressive, but simplicity is best here. Start with one and go from there.
- Date: The date the collection was made should be recorded on the label. Avoid using 08/09/94 as in the United States this usually means 9 Aug 1994 while in Europe this would mean 8 Sep 1994. The taxonomic community has largely adopted the mode of giving the day of the month first, followed by month (first three letters if abbreviated and then without a period) and finally the full year (1994, not 94).
- Field notebook and Fieldbook: It is often useful to take a small pocket notebook into the field to record notes. This is for your personal use only and is not something that becomes part of a permanent record. A field-book, however, is a bound notebook from which the pages can not be easily torn. Many taxonomists use surveyor's fieldbooks as the paper is excellent, the book is solid, and the paper is waterproof. Any bound fieldbook will do for PBIO 250. Here you should make a permanent record of your collections. The notes should be well organized, the writing readable, and a minimum of abbreviations. Remember, this is a record that is to last well into the future, and others may well wish to consult it in the future. Your fieldbook will be returned to you at the end of class.
Grading We put a great deal of emphasis on the quality of your effort. Half of your grade will be determined by the quality of your collection. Specimens that are poorly pressed or turned in wet will result in the loss of one point. Specimens that have lost their color due to poor drying, plants that are dried wilted because there was too much time between collecting and pressing will be judged poorly.
The correct identification of each specimen is a goal, but everyone occasionally misidentifies a plant. That, in and of itself, is not all that great a sin. Missing the family (especially one stressed in PBIO 250) will not be appreciated. The label itself is an important part of any specimen. A good specimen with poor label data is a poor specimen. Labels must be typed and free of all errors. Use of "white-out" or "type-over" corrections will result in a loss of points as such "corrections" eventually fail. Remember, your specimens may well last for hundreds of years; your labels need to last as well.
Labels ought to be printed with a laser printer (not a dot matrix) or with a plastic carbon ribbon so that all letters are uniformly printed. Use white paper only, a minimum of 20 pound weight with a high rag content, and of a professional grade. Do not use erasable paper. Do not write on labels.
Dirty specimens often result in dirty labels. Avoid both.
Specimens submitted for grading are not returned but becoming the property of the University of Maryland's Norton-Brown Herbarium to dispose of as seen fit. If you wish to have your collection returned for educational needs, specimens will be sent to your intended institution as a gift or on exchange as appropriate.
Conclusion A lot is being made about your collections. It is an important part of this course and a reflection upon what you learn at the University of Maryland. Your specimens, if good enough, will be housed either in the Norton-Brown Herbarium or sent to other institutions around the world to become part of a permanent record of the world's flora. We have trained several people in the art of making collections, and most people enjoy the experience. If you work at it, do not wait until the last moment, band together with others and go off in search of plants, you will end up having a great deal of fun. This is supposed to be fun. Make it so. The rest will be easy after that.